
Penetrating, Topical and Hybrid Sealants: Choosing the Right One for Your Tile
Which Sealant is right for you and your job ?
Sealing is one of the most misunderstood steps in a tile installation. Ask five people what a "sealer" does and you'll often get five different answers. Some think it makes a tile stain-proof, others think it's only for natural stone, and some assume all sealers do the same job. None of that is quite right.
The truth is that "sealer" isn't one product, it's a category, and the right choice depends on what the tile is made from, where it's going, and how you want it to look and perform once it's down. Broadly, sealers fall into three types: penetrating, topical and hybrid. Each works differently, suits different materials, and comes with its own trade-offs.
This guide walks through what each type actually does, why we recommend penetrating sealers as the default across almost all of our ranges, when a topical or hybrid finish might make sense instead, and how often you should be resealing, because the answer is very different for a shower floor than it is for a wall.
If you're specifically working with raw clay tiles, our article Why You Should Seal Raw Clay Tiles goes deeper into pre-sealing before grouting and the water-drop test. And if you're working with one of our handmade glazed collections, it's worth reading Understanding Crazing alongside this article, since crazing is a big part of why we recommend sealing glazed product too.
Penetrating Sealers: Our Recommended Starting Point
A penetrating (or "impregnating") sealer doesn't sit on top of the tile. It's absorbed into the surface, where it lines the internal pore structure of the material. Rather than forming a film over the tile, it works from within it - which is why penetrating sealers are also described as non-enhancing: they protect the tile without changing how it looks or feels.
This is the sealer type we specify across our natural stone, raw clay and handmade glazed collections, and it's the type named in every one of our installation guides and spec sheets.
A simple way to picture it: think of a dry sponge. If you pour a liquid sealant into that sponge and let it cure, the sealant fills and hardens within all those tiny holes throughout the sponge's structure. Water poured over it afterwards can no longer travel through those holes as easily, or at all, they're already filled and set. A penetrating sealer works on a tile in exactly the same way: it travels into the pores of the material and hardens there, so liquid has nowhere left to go.
What it actually does:
Once inside the tile, a penetrating sealer significantly reduces how much liquid the pores can absorb. Water, oil and everyday spills bead on the surface for longer instead of soaking straight in, which gives you time to wipe them away before they become a stain. This is a meaningful reduction in absorption - but it's important to be accurate about what that means in practice.
What it won't do:
A penetrating sealer reduces porosity, it does not eliminate it, and it doesn't make a tile stain-proof. It will not stop a texta, crayon, a kids tyre wheel skid mark, or a strongly pigmented dye from marking the surface if it's left in contact with it, and it won't prevent staining from something left to sit for an extended period. What it does is buy you time and dramatically lower the risk of everyday spills, splashes and oils becoming permanent marks. Manufacturers test and publish absorption-reduction figures for their specific formulations, worth pulling from the product data sheet for whichever sealer you land on, since the exact percentage varies by product and by the porosity of the material it's applied to.
Why it doesn't change the colour or texture:
Because the sealer is absorbed into the tile rather than coating it, there's no added layer sitting on the surface to catch light differently, add sheen, or shift the tone of the material. This is exactly the language used in our own installation guides: a water-based penetrating sealant "provides a protective coating to the tiles without changing the colour or texture." For handmade natural stone and clay, where the whole appeal is the tile's raw, tactile, natural finish, this matters enormously, you're protecting the material without editing its character.
Why Molecule Size Matters: Not All Penetrating Sealers Are Interchangeable
Here's the part that often gets missed: not every penetrating sealer suits every material, even though they all work on the same basic principle.
Every porous material - natural stone, raw clay, concrete - has its own internal pore structure, and the size of those pores varies significantly between materials. A dense limestone has a different pore structure to a handmade clay body, which in turn differs from a softer, more porous stone like a Marble, Travertine or Moroccan Limestone. A penetrating sealer is formulated with a specific molecule size, and for it to actually do its job, those molecules need to be the right size to travel into the pores of the specific material.
This is why a sealer that performs beautifully on one type of stone may not be the best choice for an unglazed clay with larger molecule spaces, and why we don't recommend just grabbing "a penetrating sealer" off the shelf without checking it's suited to the specific material. It's also why we point installers toward a shortlist of tested, reputable products rather than leaving it open-ended, we know these particular formulations are compatible with the porosity and structure of our ranges.
Hybrid Sealers: Penetration With a Topical Finish
A hybrid sealer does two jobs in one product. Part of the formulation penetrates into the tile the same way a standard penetrating sealer does, while another part remains on the surface, curing to leave a thin topical residue.
Because there's genuinely a layer sitting on top of the tile, even a fine one, a hybrid sealer will change the tile surface very slightly. Typically this shows up as a subtle shift in colour tone (often a gentle deepening or enrichment) and a small change in surface texture or sheen, sometimes described as a soft satin finish. It isn't dramatic, but it is noticeable, particularly compared with the "as-is" look of a true penetrating sealer.
Hybrids can be a reasonable middle ground when you want the absorption benefits of a penetrating product but also want a bit more surface resilience or a slightly richer tone. The trade-off is that you're no longer working with a fully non-enhancing product, so testing on a spare tile first is essential, and it's not what we'd recommend if the goal is to preserve the tile's exact natural finish.
Topical Sealers: When and Why We're Cautious
A topical sealer doesn't penetrate the material at all. It forms a film or coating on top of the tile, similar in principle to a varnish or lacquer (Think clear nail polish, sitting above the surface rather than within it).
The appeal:
Because it creates an actual barrier layer, a topical sealer can noticeably deepen colour and add a glossier, more "glazed" appearance to the tile. On some materials, particularly darker stones or clays, this can look striking, it's the closest a sealer gets to visually transforming the tile rather than simply protecting it.
The problems:
That surface film is also where topical sealers run into trouble:
- Because they sit on top rather than being absorbed, topical sealers are more prone to visible wear, scuffing, yellowing and peeling over time, especially in high-traffic or high-moisture areas like shower floors and kitchens.
- Many topical products aren't breathable. Moisture that would normally move through a porous material can instead get trapped beneath the film, which can lead to issues like efflorescence, delamination, or the coating lifting.
- On handmade tile, where every piece has natural variation in porosity and surface texture, a topical film can cure unevenly from tile to tile, drawing attention to inconsistencies rather than unifying the surface.
- Removing or reapplying a topical sealer is a bigger job than a penetrating one, it generally needs to be stripped back before a fresh coat goes on, rather than simply reapplied over the top.
For these reasons, a topical sealer isn't part of our standard recommendation across our ranges. Where a customer specifically wants the deeper, glazed look a topical product creates, it's a legitimate aesthetic choice, but it should be gone into with open eyes about the maintenance trade-off, and always tested on a spare tile first.
What We Recommend, and Why
Across our natural stone, raw clay and handmade glazed collections, our installation guides and specification sheets consistently point to the same shortlist of tested, penetrating, water-based sealers:
- Guard Industry TDS-2140 Protect Guard MG
- Dry-Treat Stain-Proof, Meta Crème and Stain-Proof Plus
- Miracle Sealants 511 Porous Plus (Penetrating Sealer)
These are specified because they're water-based, non-enhancing penetrating formulations that protect porous material without altering colour or texture, and because we've seen them perform consistently across our range of stone and clay bodies. For any of these, apply with a paintbrush or roller rather than a spray, to keep coverage even, and always follow the manufacturer's application instructions for your specific product and surface.
A few notes on where sealing is and isn't needed across our collections:
- Moroccan Zellige, Moroccan Limestone and Dunya Stone (unglazed, porous): sealing is required. A minimum of two coats before installation and one coat after grouting is standard.
- Tierra and Amano (handmade glazed ceramic): although the surface is glazed, we still recommend a penetrating, non-enhancing sealer, more on why below.
- Ondara and Nusa (fully glazed / glass, non-porous): sealing the tile face itself isn't required, as there's no porosity for a sealer to work with. Grout joints in these installations may still benefit from sealing at the installer's discretion.
A Note on Glazed Tile and Crazing
If a sealer protects against absorption into a porous surface, why would we recommend one for a glazed tile at all?
The answer is crazing. As we cover in Understanding Crazing, crazing is a fine network of hairline cracks that can develop within the glaze layer of handmade ceramic, it's a recognised characteristic of artisan glazed product like our Amano and Tierra collections, not a defect, and it doesn't affect the tile's structural integrity. But those hairline cracks do create more surface area for moisture and dirt to reach, which increases the potential for staining if crazing develops or becomes more pronounced over time, particularly in wet applications like showers, pools and fountains.
This is why our installation guides for Amano and Tierra recommend a penetrating, non-enhancing sealer even though the tile is glazed: it isn't sealing the glaze in the way you'd seal an unglazed stone, it's adding a layer of protection against staining should crazing occur, without changing the appearance of the glaze itself. Sealing before and after installation acts as a helpful grout release for these products too, and because crazing increases the surface area exposed to moisture, these collections should be resealed more frequently than a standard glazed tile, see the resealing schedule below.
How Often Should You Reseal, and Why It's Different for Walls
There's no single resealing timeline that applies everywhere, because how hard a sealer is working depends entirely on how much traffic, moisture and exposure the tile sees. As a general guide, based on our installation guides:
- High-traffic and high-moisture areas - Commercial Floors, outdoor flooring, kitchen floors, entries, splashbacks, showers and shower bases — should be resealed roughly every 12–24 months. These surfaces are in constant contact with foot traffic, water, oils and cleaning products, so the sealer is being worn down and needs regular renewal - the sealing period could even be sooner than 12 months, for commercial areas - it is entirely job specific.
- Low-traffic, low-moisture areas - feature walls, fireplaces, decorative surfaces, can often go significantly longer between applications, up to around 10 years, and in some cases a wall may never need resealing again after the initial application. A vertical wall surface isn't absorbing standing water or foot traffic, so there's simply far less demand placed on the sealer over time.
Showers, shower bases and walls specifically: because shower floors and bases sit in near-constant contact with water and are walked on daily, they sit at the high-traffic end of that schedule and should be checked and resealed on the more frequent end (every 12–24 months, or sooner if a water-drop test shows the sealer is no longer beading water). Shower walls, by contrast, are exposed to moisture but not foot traffic or standing water, so they wear far more slowly, reseal them on a much longer cycle, checking periodically rather than on a fixed schedule.
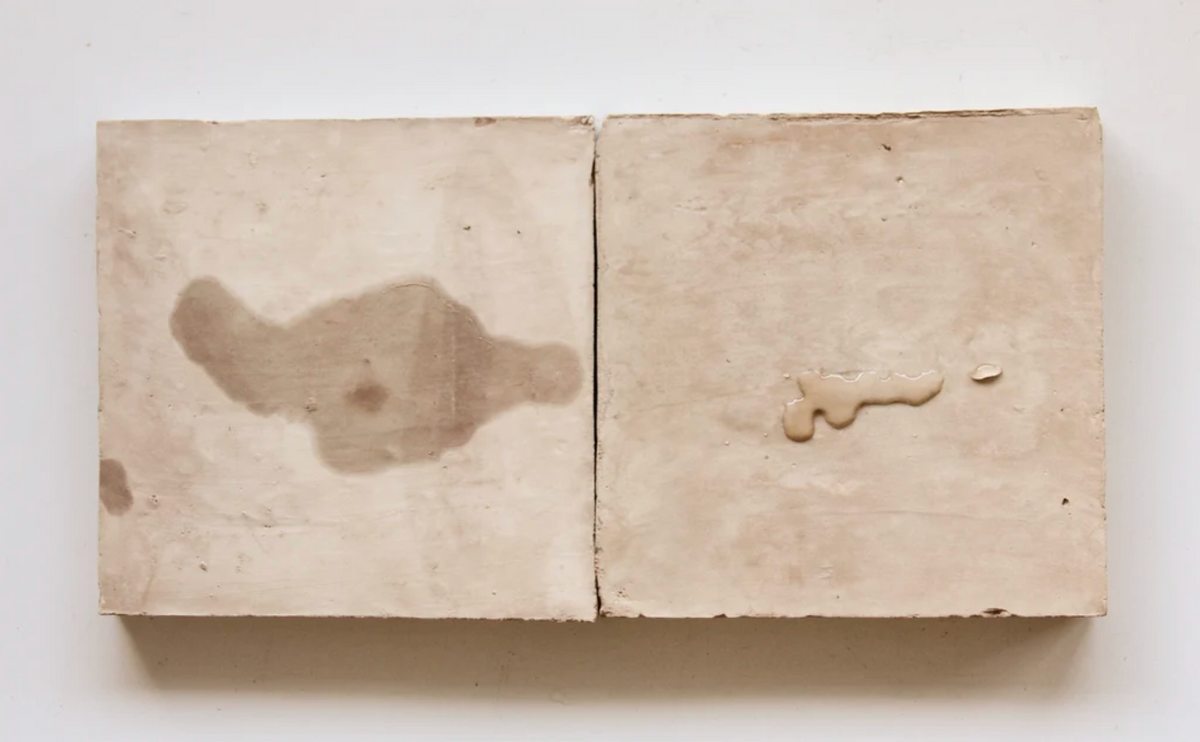
Rather than working strictly to a calendar, the simplest way to check whether a surface needs resealing is a water-drop test: place a small amount of water on the tile and watch what happens. If it beads and sits on the surface, the sealer is still doing its job. If it soaks in quickly and darkens the tile, it's time to reseal.
The Short Version
Penetrating sealers are our default recommendation across almost every range we carry, because they protect the tile from within without changing how it looks or feels, but they reduce absorption rather than eliminate it, and the right formulation depends on matching the sealer's molecule size to the material's own pore structure. Hybrid sealers add a light topical layer on top of that penetration, which brings a subtle colour and texture change. Topical sealers sit entirely on the surface and can noticeably deepen colour and add a glazed sheen, but come with real trade-offs around durability, breathability and maintenance. And resealing frequency should follow exposure, not a fixed rule, high-traffic, high-moisture surfaces like shower floors need attention every 12–24 months, while walls can often go a decade or more between applications.
For product-specific application instructions, always refer to the installation guide and specification sheet for your particular range, and test any sealer on a spare tile before treating a full installation. If you're ever unsure which sealer suits your project, our team is always happy to help you choose.